Hope you like it :)
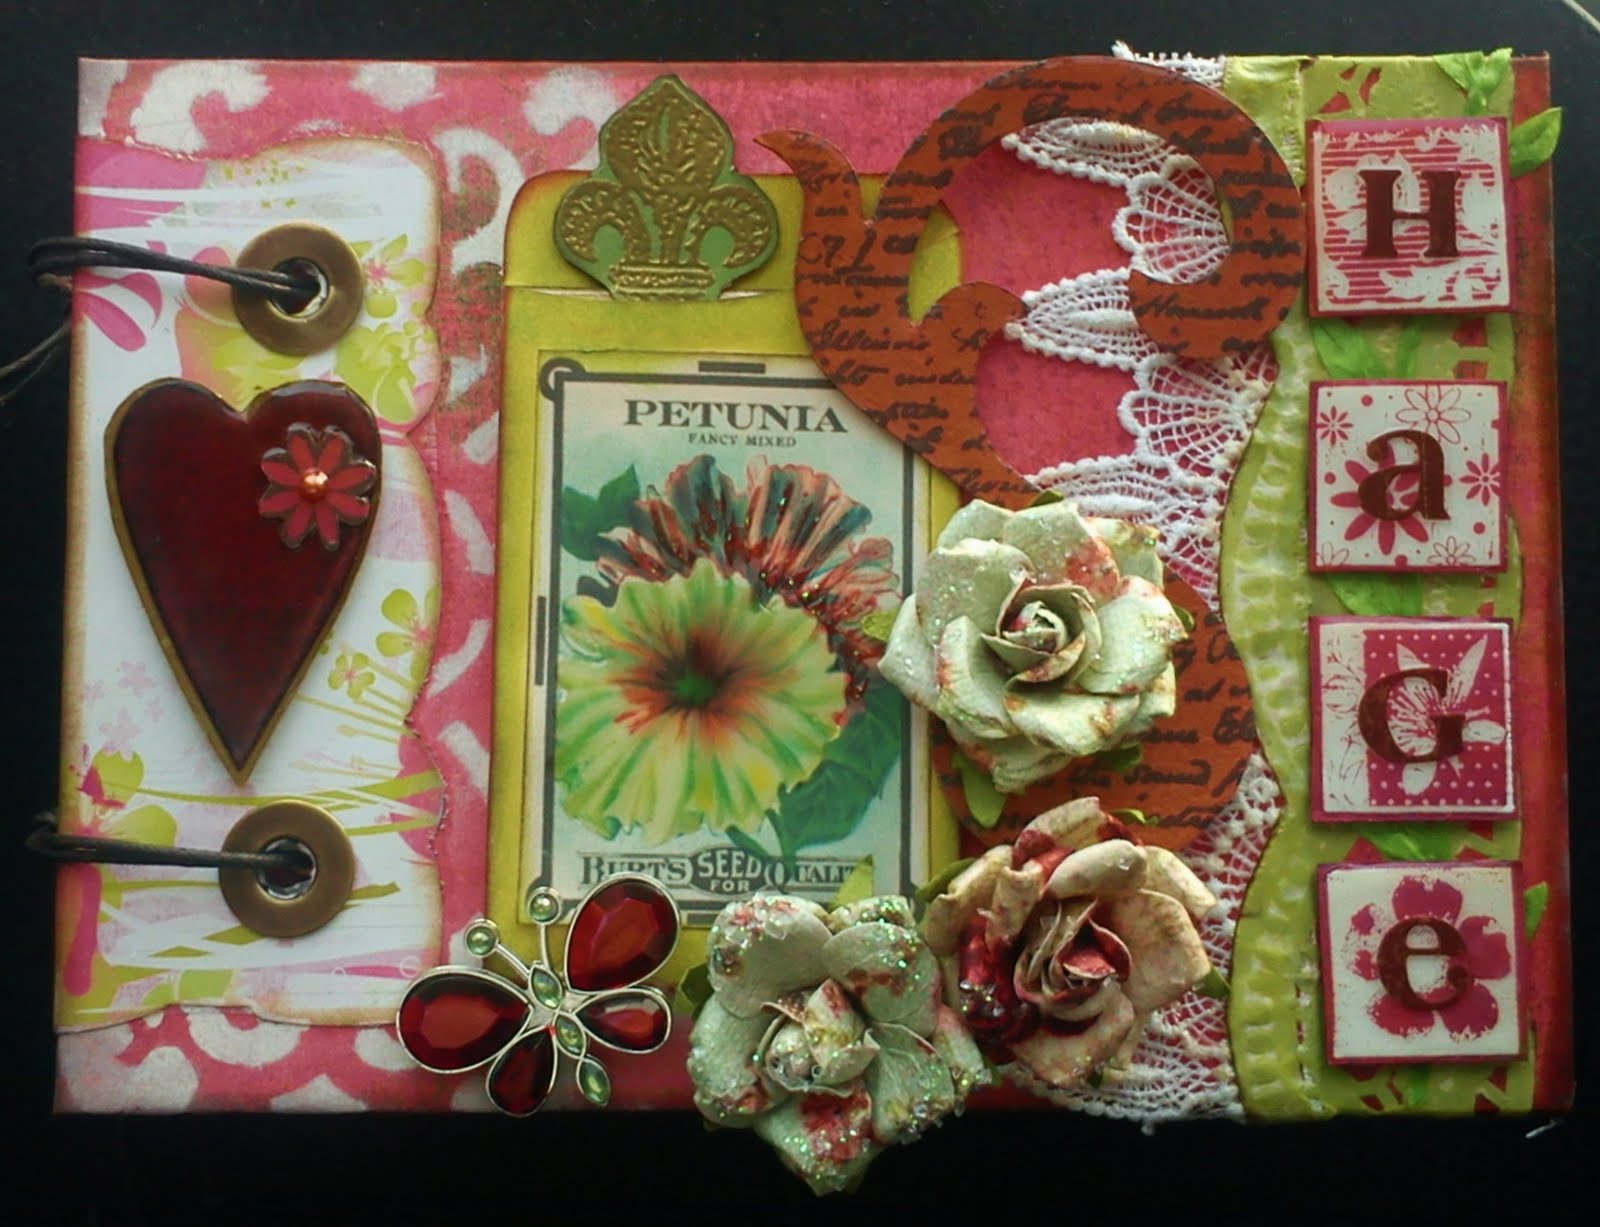
The front cover of my mini
I mainly used Basic Grey - Sultry paperpad for this album.
And heaps of vintage photo distress ink :)
I wasn't quite happy about the bright pink background paper and toned it dowm using a mask and white opache ink, the pocket is an inked coin envelope, which I redused in size to fit the print out of the vintage petunia seed packet. the flowers are primas, the butterfly is from a dollar store, it was turquois and I alcohol inked it to match. I glued down some venice lace and paperlace napkin over it. The letters which spells hage, the norwegian word for garden, was made by heat embossed stamping chipboard using inchie stamps from inkadinkado, I then glued down the chipboard letterstickers and used diamond glaze to finish them off.
The swirl is maya road chipboard, painted stamped with french script stamp, embossed and finished off with diamond glaze. there's a small handmade and stamped tag in the coin envelope. the fleur de lis pull is embossed. The heart was cut from cardstock and covered in paper, the small flower is a stamp, and I put diamond glaze on it. I popped things up with some dimensionals.

The inside of the cover
It's not done yet :) I've added a quote, I've used quite a few quotes throughout this album. Another coin envelope pocket and a dimensional flower sticker.

The first page
All the pages was made out of office supply envelopes, glued shut and cut open in one end to make tag pockets. I'll have to make some changes to this first page, caus I don't like it :)

The back of the first page
I'm a lot happier with how this page turned out. I made a small booklet hinged with twine, it opens by flipping the pages upwards. Created a lot more room for pictures.
 I
IThe booklet flips open like this.
It has 5 pages total with room for photos and journalling on the front and back. And of course I glued the picks on the backs upside down at first lol :)The fist spread is all about seeds and cuttings, hence the quote...

The second page of the book and the right page of the first spread.
Chipboard letters and lace to embellish the tag pocket. I googled and printed out some vintage seedpackets and made tags with stamped journaling spots on the back. embellished with paper flowers. And another quote hidden under the tags :)

Closeup of some of the vintage seedpacket tags I made

The back of the second page and the left page in the second spread
This page has a really fun peekabo pocket, which can also be made and used as a gift card holding card :) the link to the tutorial is HERE. I embellished the pocket with a uteed flower, a Velma flower. it looks like glass. Check out her tutorial HERE. The pocket's held shut with a magnet. I'll show you how it opens in a sec :)

The top flips open

The fun gift card/tag pocket folds down

And Tadaaah, the doors open to reaval this :)
- don't you just Love this beautiful poppie. The pocket was made using one cut sheet of double sided patterned paper, lace and some stamps. 
The third page and the right page of the second spread.
A pickture tag slides under the border and when it comes out it reveals...

A quote and an unfinished page :)

The back of the second page and the left page of the third spread...
This page is quite unfinished. It has a large pocket for photos and tags. the clematis picture is just adhered at the bottom pocket, so that I can slide photos and tags behind it. I finished one tag with a bird inchie pull.

The third page and the left page in the third spread...
It's my easter flowers page, and it's not yet finished, I'm going to cover the quote with a photo. This is a hinged pocket page.

There's a tag inside the pocket opening on the left side...

The flap opens to the right like this...

The back of the third page and the left page of the fourth spread...
This page has got a tag pocket made from a modified coin envelope and embellished with a photo. Some prima bling on the side and a resin rose.

And of course room for tags inside the envelope page opening to the left.

The fourth page and the right page of the third spread...
This is an accordion booklet which is held shut with a small thing I don't know the english name for up in the right corner. It was supposed to close with a magnet but it's to fat for the magnet to work properly :)

It folds down like this :)

And it folds up like this, to reveal another hinged page...

And the flap opens to the right like this...
with room for more quotes and pictures...

The back of the fifth and final page :)
This page is not finished. it's just got a large pocket for tags and pictures.

The inside of the back cover of my album ready to be worked on....

And here's the back cover, still unfinished...
Phew, that's my longest post ever, and if anyone actually reads the whole post, it's nothing short of a miracle, lol. Writing this post has made me well aware that it's not just a lot of fun making mini albums but, there can also be a lot of work involved, lol.
Thank you so much for taking a look at my album, hope you enjoyed it and who knows maybe you got inspired to make one for yourself or someone special :)
take care,
hugs and smiles,
Linda
WOW WOW WOW Linda absolutely stunning, your garden album is so beautiful, fantastic work.
ReplyDeleteHugs
Anke
Oh wow sweetie this is absolutely gorgeous.
ReplyDeleteSo lovely details. Love it, love it, love it.
Amazing how you do all sorts of media. Love the versitality of your work. This mini is gorgeous. Great paper line! Kate
ReplyDelete